Recovering Photos From Bad Storage Cards
On March 17, 2014 by Jonathan ZdziarskiA Guide for Photogaphers, Not Geeks
Most photographers have had at least one heart attack moment when they realize all of the photos they’ve taken on a shoot (or a vacation) are suddenly gone, and there’s nothing on the camera’s storage card. Perhaps you’ve accidentally formatted the wrong card, or the card just somehow got damaged. If you’re a professional photographer, there’s a good chance your’e also not a forensic scientist or a hard-core nerd (although it’s OK to be all three!). That minor detail doesn’t mean, however, that you can’t learn to carve data off of a bad storage card and save yourself a lot of money on data recovery. While there are many aspects to forensic science that are extremely complicated, data carving isn’t one of them, and I’ll even walk you through how to do it on your Mac in this article, with a little bit of open source software and a few commands. If you’re scared of your computer, don’t worry. This is all very easy even though it looks a bit intimidating at first. You can test your skills using any old storage card you might have on hand. It doesn’t have to be damaged, although you might be surprised just how much data you thought was deleted from it!
First, lets talk about how your storage card works. When you plug your storage card into your computer, your computer looks for a list of files on the card; this is kind of like a rolodex of all the files your camera has stored. This “catalog” basically says, “OK, this file is this big, and it starts here”. You can think of it like the table of contents of a book. When you format a storage card, most of the time it’s just this table of contents that gets deleted; the actual bits and bytes from the photo you took aren’t erased (because that would take too long). The same can be true when the file system becomes damaged; in most cases, it’s just the file listing that gets blown up somehow, making it appear like there are no files on the card. In more extreme cases, physical damage can sometimes damage the data from one part of the card, but the data for the other half of the card can still be recovered; your computer needs to be told to look past all the damaged data, instead of just giving you an error message.
Think of your pictures as chapters in a book; data carving is the same as scanning through the contents of the book to figure out where each chapter starts, but ignoring the table of contents. If you think about how a book is laid out, every chapter usually begins with the words “Chapter 1” or “Chapter 2”; files work in much the same way. Whether it’s a JPEG, NEF, CR2, or virtually anything else, each file has a unique signature that the computer can search for that tells it “this is the beginning of a file”. So even if there’s no table of contents, the computer can read through your entire storage card looking for these signatures, and then try to “carve” out the files to restore them as actual files on your computer.
One of the other nice things about storage cards is that they’re solid state, and because of that, they were designed with something called wear leveling technology. Wear leveling is designed to prevent any one part of the card from getting worn out too fast; it causes files to be spread out pretty evenly on the card, instead of overwriting the same spot again and again. In most cases, your camera will write all the way to the end of the card before coming back around to overwrite data at the beginning. This means that data stored on your card is likely to last a long time, even if you’ve since taken a bunch of new pictures.
How To Handle The Situation
If you suddenly realize your storage card is blown away, the first thing to do is to stop using that card! Don’t format it. Don’t try to save more photos to it. Doing anything to write to it could potentially overwrite data that’s still on the card. If you accidentally formatted your card, the same holds true – stop using it. If you write more pictures to it, you may very well overwrite the files you want to get back!
Next, if your storage card has a write-protect bit, go ahead and write protect it. If not, don’t sweat it. In the forensics world, we have things called “write blockers” that prevent anything from writing to your card, but in this case, you really don’t have too much to worry about. We’re not trying to prosecute a criminal using the evidence on your card (I hope), so the tiny amount of writing your computer may or may not do isn’t going to hurt anything. Connect the storage card to your desktop (using a card reader, if necessary). If you have a damaged card, you may end up with a message like the one shown below when you plug it into your computer’s card reader.
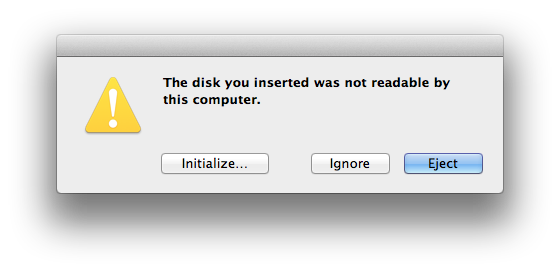
Don’t eject it, and whatever you do, don’t initialize it. Just click Ignore (or you can even just leave the window up if you’r afraid to do anything). Sometimes, you may not see an error like this; the card might just appear on your desktop, but appear to have no files. That’s OK too. In either case, this is a good sign as the card has been identified by your computer – it can talk to it!
Creating a Disk Image
Now that the card is connected, lets make an identical copy of the card to back up all of the contents. You’ll need at least as much free disk space on your computer as your storage card can hold (for example, 32 GB).
To create a disk image, open up a terminal window. You can find the Terminal program in the Applications folder, inside another folder named Utilities. You might consider dragging Terminal onto your dock. Double click on Terminal, and it will pop up a small text window on your desktop. Type in the following command, and make sure to press enter after:
diskutil list
This command will cause your Mac to spit out a list of all the disks that are connected to your Mac (your storage card is considered a disk here).
What we’re looking for is the disk that matches your flash card – in my case, it was the 16 GB disk (disk2) is the 16 GB storage card I’ve inserted into my card reader. The important thing to remember here is “disk2”; that “label” is how we can make sure we’re copying data from the right disk. The full “path” to that disk is /dev/disk2, which we’re going to use next, so make a note of what yours reads for your storage card.
Now lets make a backup of your storage card; it will store all of the bytes that it’s able to read from the card into one big file most people call a “disk image”. Type the following command into the terminal window and press enter. Make sure to change the “disk2” in the “/dev/disk2” path to whatever disk your storage card is labeled as.
sudo dd if=/dev/disk2 of=StorageCard.dd conv=noerror,sync bs=4096
After you hit enter, you’ll be prompted for your password, because this needs to run as the computer administrator. Type your password and hit enter; then get ready for a long coffee break.
What’s this doing? The dd command is a disk copy command that is creating a copy of your storage card (/dev/disk2, or whatever you specified), and writing the copy to a file we named StorageCard.dd, which will be created in your home directory. The “if=” stands for input file, and the “of=” stands for output file. We specified a couple of other options, too: the noerror tells the disk copy tool not to stop if it encounters bad blocks that it can’t read; in other words, if your storage card was sitting at the bottom of the Hudson river for a while, it might have some physical damage. This causes the parts of the storage card that are unreadable to get skipped (instead of causing everything to screech to a halt) and continue reading the rest of your storage card’s good bits. The sync tells disk copy to put zeroes into our copy of the data if it can’t read some of the data, so that we aren’t squishing any data together if it can’t read something; lets say the part of the card containing data for a small number of pixels are unreadable in a photo, you still want the rest of that photo to look right and not get all squished together, so it replaces that missing data with zeroes. Lastly, bs=4096 simply tells disk copy that we’re copying data in 4k chunks (it stands for block size).
This process may very well take a few hours, depending on the size of your storage card. Even if you didn’t fill up your card with photos, it’s going to copy all of the empty space as well. You want this, because if that table of contents we talked about is damaged, then your photos might still live in that “free space” – and we’ll be able to pull them out! If you refresh your Finder window from time to time, you should see the file size growing substantially on the StorageCard.dd file.
Data Carving
Once your disk copy completes, we’re going to use a free program that you’ll need to download in order to recover them. One of my favorite data carving tools is called photorec. Photorec was originally designed as a tool to scan through a disk image (like the one we’re making) and pull out any pictures that still exist. It now supports hundreds of different file types, far beyond just photos. It can pull out Microsoft Word documents, PDFs, and virtually anything else you might want to recover. You can download Photorec from http://www.cgsecurity.org/wiki/PhotoRec. Click the download link on the left, and then download the “TestDisk” for “Mac OS X Intel”.

Once you’ve downloaded it, it should appear in your Downloads folder. My copy of the file was named testdisk-6.14.mac_intel.tar.bz2. Find this file in the Finder and double-click on it. It should create a folder named testdisk-6.14. Go into this folder, and you should see a file named photorec. If you’re not very computer savvy, just take that file and drag it into your home directory – the same directory that your StorageCard.dd file is in. You can use it from there. If you are more on the savvy side, you can copy photorec into /usr/bin so that it is accessible from anywhere using the terminal. To do this, try the following command:
sudo cp -p ~/Downloads/testdisk-6.14/photorec /usr/bin
Either way, assuming your storage card has now finished copying, you should have an approximately 16 GB (or 32 GB, or whatever size your storage card is) size file sitting in your home directory named StorageCard.dd. To carve all of the data out of this file, type the following command and press enter.
./photorec StorageCard.dd
If you performed that savvy step of copying photorec into /usr/bin, you can leave off the ./ at the beginning, and just type:
photorec StorageCard.dd
Either way, photorec should start. Photorec is a command-line program so you’ll walk through a few different screens. The first screen will make sure that you have your StorageCard.dd file selected.
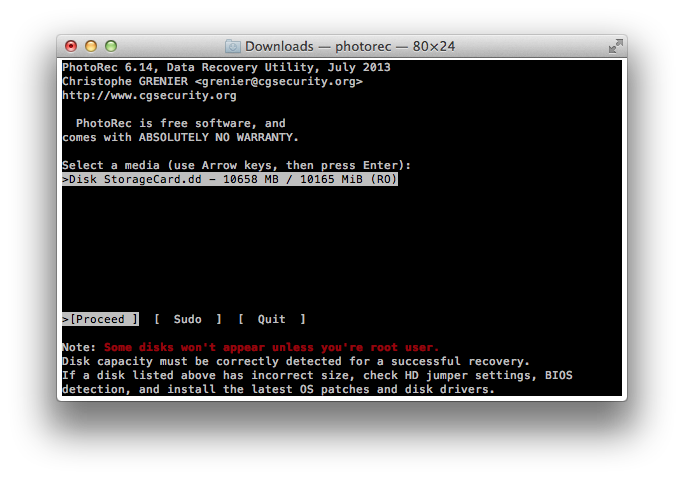
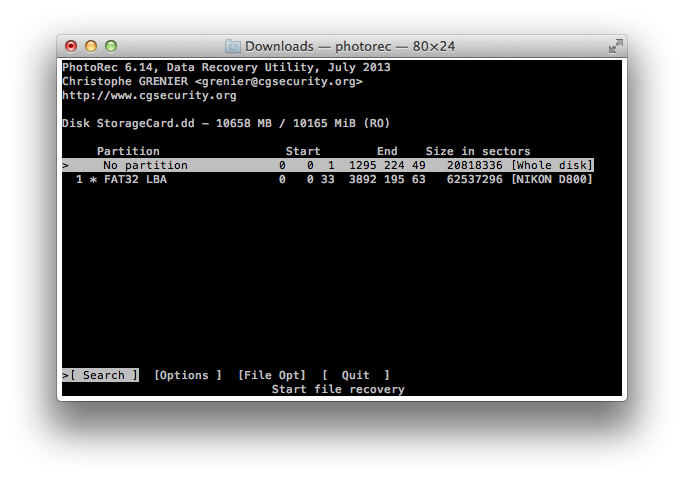
Hit enter here. The next screen will give you a list of partitions on the storage card, if available. Use your arrow keys to select “No partition”, then hit enter. This tells photorec to scan the entire disk image for data.
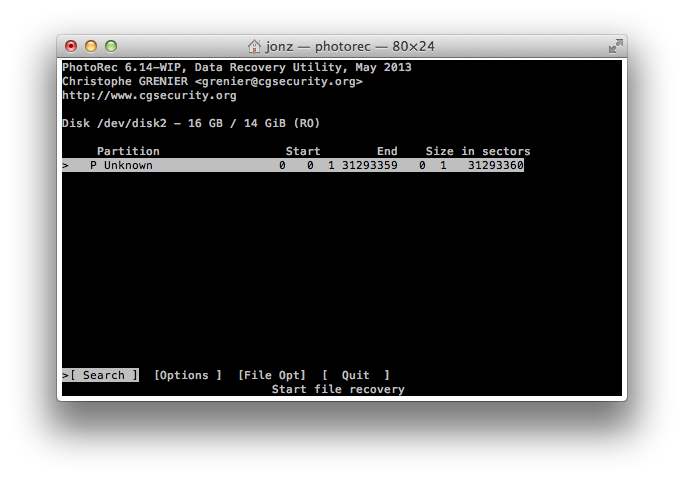
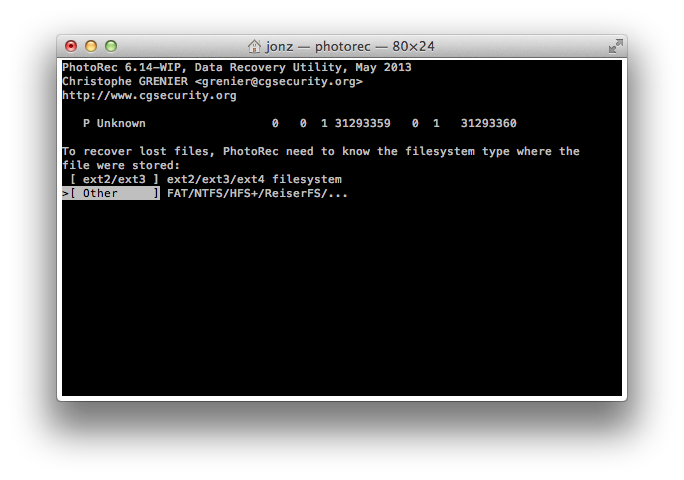
Alternatively, if there has been some damage to the file system, you may just see “Unknown” appear. That’s fine too. With unknown selected, just press enter.
The next screen is trying to figure out what kind of file system the storage card uses. Make sure you select Other here and hit enter, so that photorec looks at every single byte of data on the card.
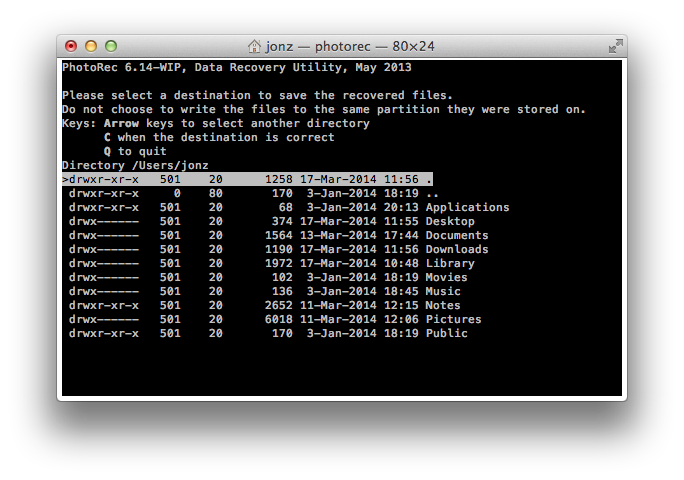
 The next screen is going to prompt you for a place to store recovered files. Photorec creates a series of folders, so it’s perfectly fine to use your home directory for this. Just press “C” here to start the recovery.
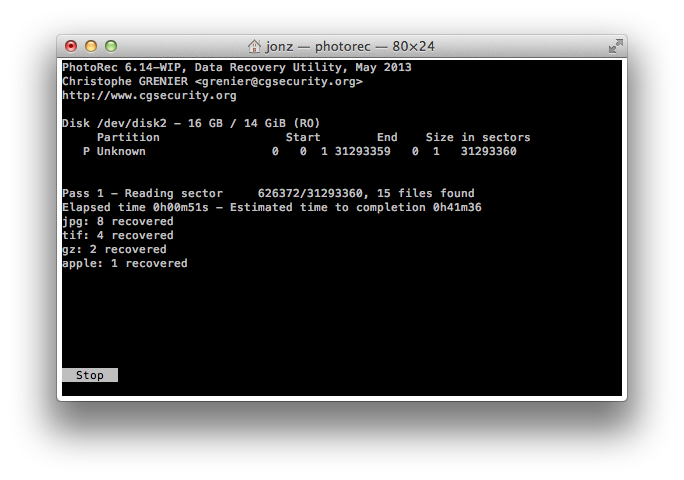
 Once you push “C”, photorec will begin recovery any data it’s able to carve out of the storage card’s disk image. As it progresses, you’ll see it keep count of the files recovered.
 The photorec program creates a series of numbered directories prefixed with “recup_dir”, for example recup_dir.1; up to 500 files are stored in each folder, before a new folder is created. When photorec has completed, you’ll have one or more folders containing the files that were recovered from the image.
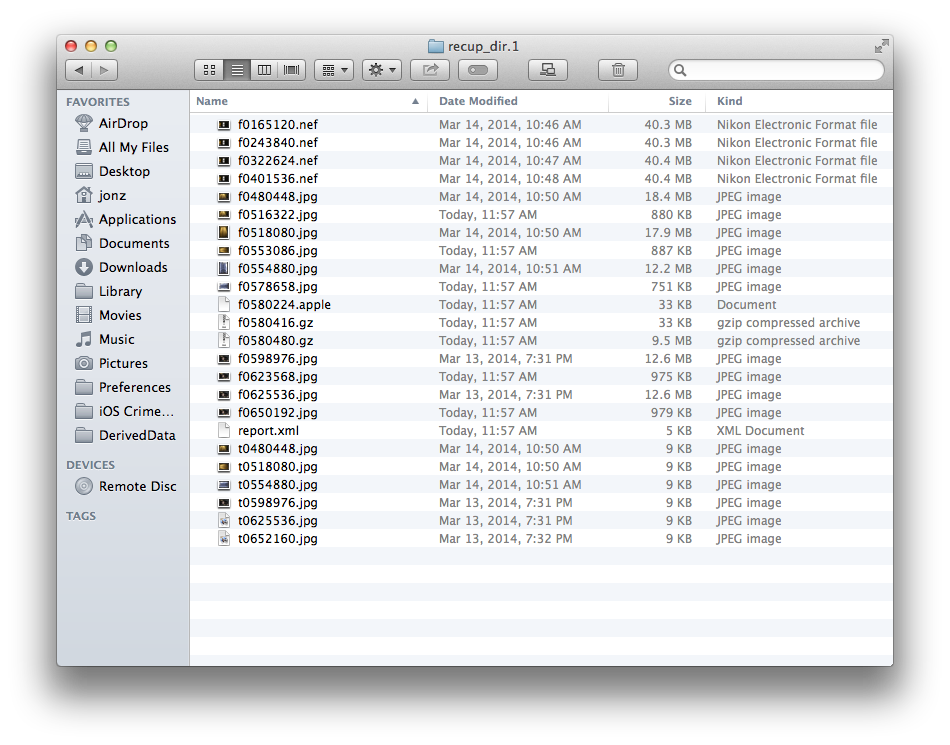 Notice how some of the recovered files were actually thumbnails? That’s because some image formats actually store a “file within a file” containing the thumbnail of the image inside of them. Photorec pulled those out, too! You can now copy out the files that you want to use, then delete the rest.
To clean up after photorec, be sure you delete the StorageCard.dd file that you created, as that’s going to take up a lot of disk space on your computer. That’s essentially a mirror copy of the storage card, and so once you’ve got the files you need, you can get rid of that. You can also delete the old test disk folder and the .tar.bz2 file you downloaded from photorec’s website. Just be sure to keep the photorec program itself, if you plan on using it again in the future.
If you do use photorec frequently, I’d recommend copying it into your /usr/bin or /usr/local/bin directory, so that you can get it out of your home directory and access it on the command-line anytime you want. You can go back a little bit in this article to get the command to do this.
Summary
Recovering data from a bad storage card is easy to do, and you don’t have to be a forensics expert to do it. While it’s not a guarantee, more often than not the data you want is still readable, and unless the card has been completely destroyed, you should be able to get some or all of it back.
So what have you done here? Well, if you’ve done everything right, you’ve…
1. Created a forensic copy of the storage card, skipping around any bad areas
2. Used a popular, open source data carving tool to recover data from a forensic image
3. Most importantly, gotten your photos back!
Give yourself a pat on the back!